Showing posts with label DIY. Show all posts

Monday, February 6, 2012

DIY: No Sew Monogram

Is it really Monday again already? I must admit that I didn't watch the Super Bowl yesterday. Did you guys? Heard Madonna was amazing... kind of bummed I didn't at least tune in for that. I did accomplish this super easy DIY over the weekend.


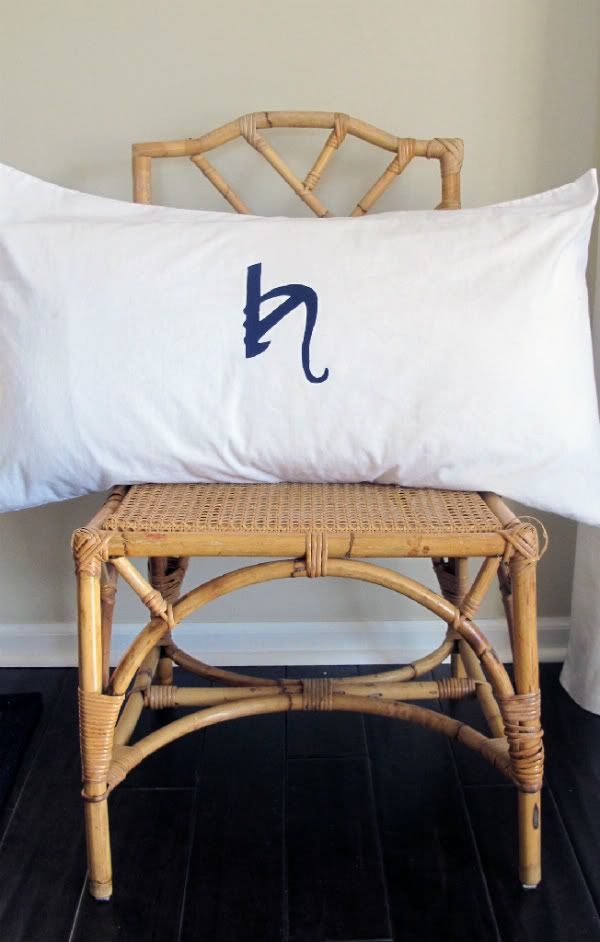
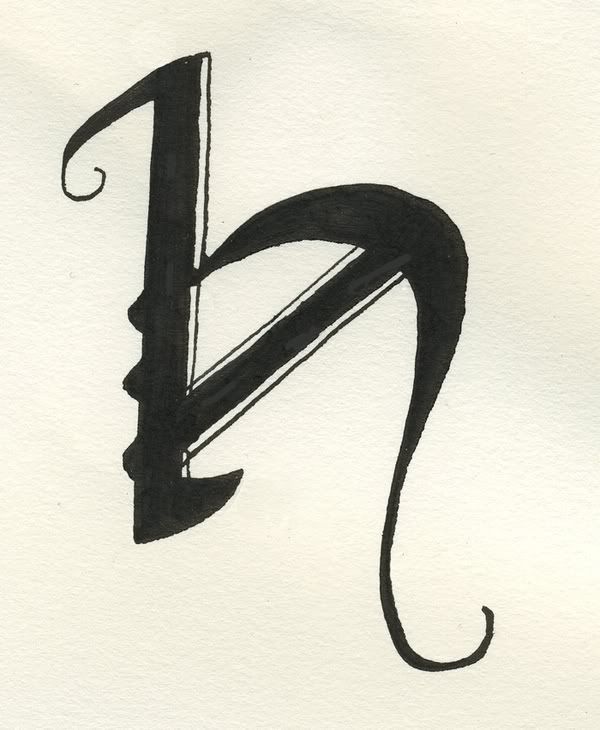
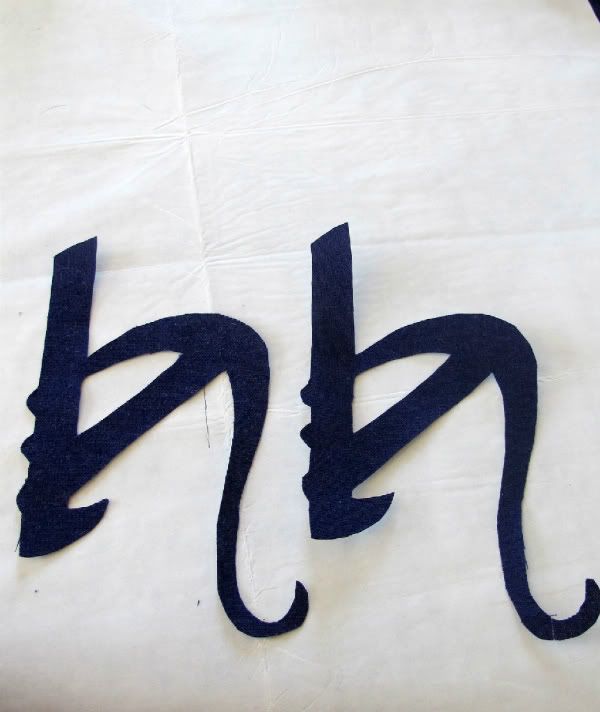
I found this awesome h on Today is Going to be Awesome and knew I wanted to use it somehow.
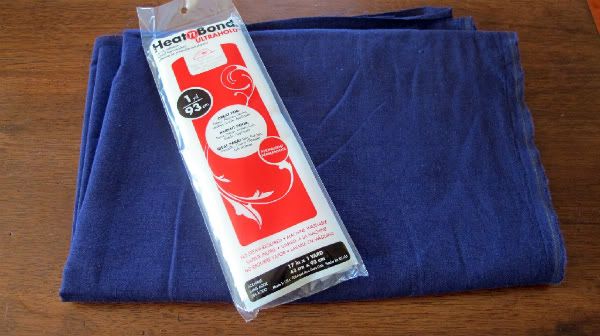


Supplies:
Pillowcase
Iron
Fabric
Heat N Bond
Monogram Stencil


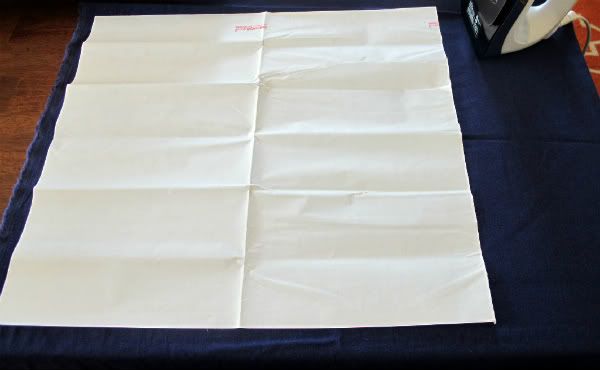
First, iron on the Heat N Bond to the fabric glue side down.


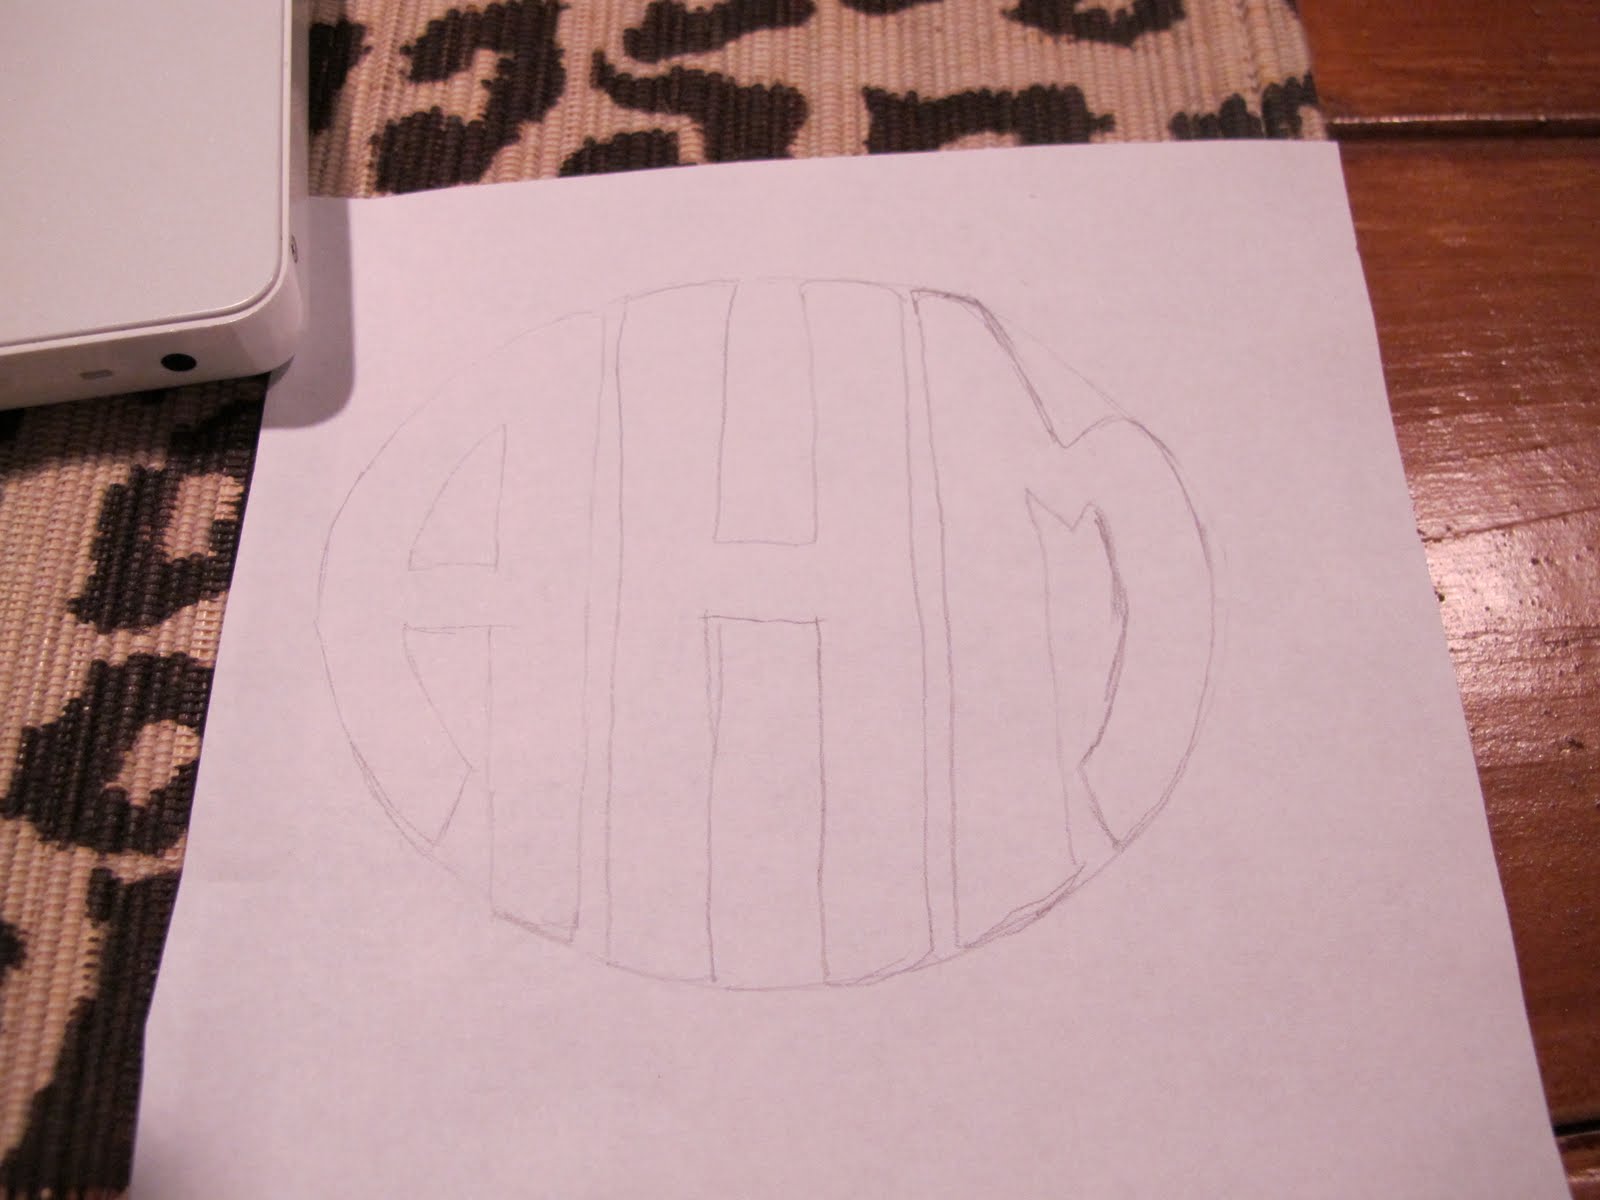
Then trace the monogram you want to use on to the paper. Don't forget to trace the
monogram on backward!
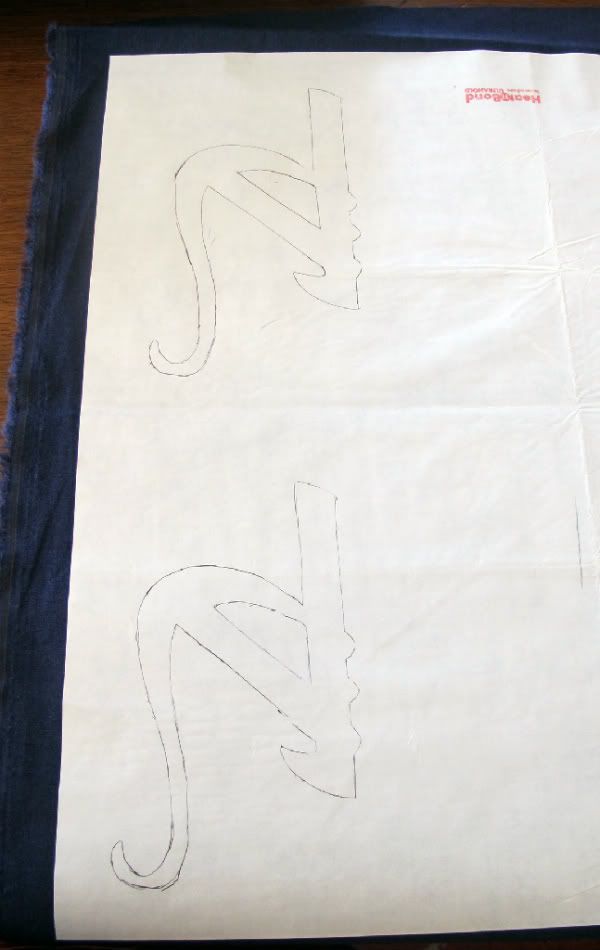

Cut them out!


Lastly, glue them on to your pillowcase(s). I didn't get a picture of this step but it is pretty self explanatory!


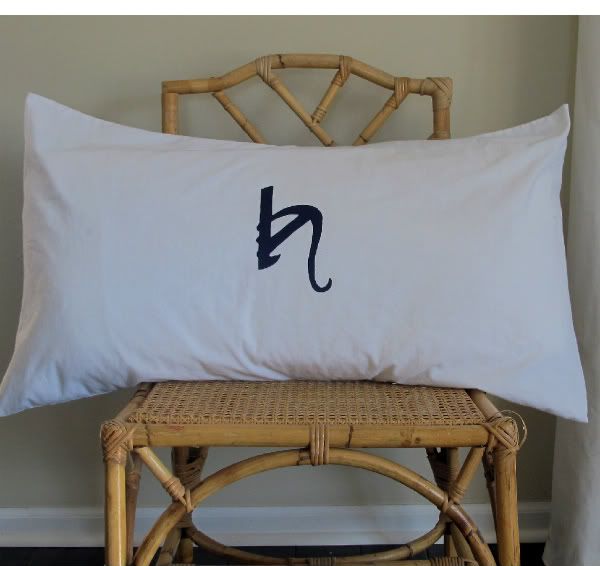
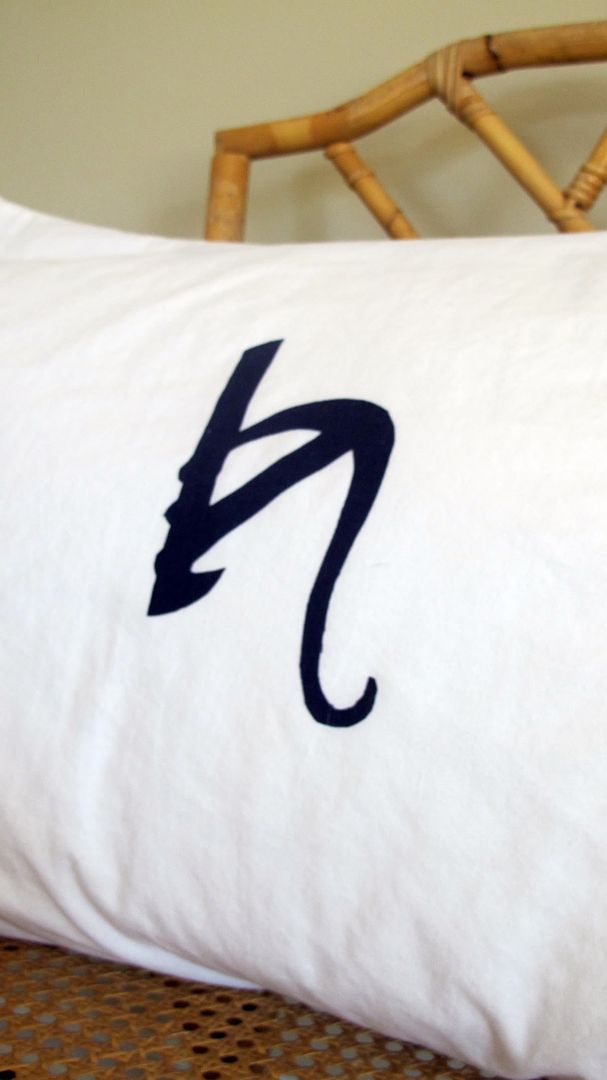
Come back tomorrow to see what they look like in the master bedroom!


Pin It

Monday, January 30, 2012

DIY: Ikea Lack

Happy Monday, friends! Today I have a fun IKEA hack for you. This one was super easy
but a little time consuming. In the end, it was definitely worth the time
because it makes such a huge impact!


My inspiration came from this photo. I first tried to use nailheads, which didn't work. Then I tried thumbtacks, but they were too big. And then hit it me! Why not use brads?!


Supplies:

Brads (you can find them in the scrapbooking section at any craft store)
Scissors
Hot Glue Gun
Lack Table

All you have to do is cut the back of the brads off (yes, regular scissors do work) and glue
them on following the pattern! Super simple.

Before:


After:


Send pictures if you try it, I would love to see how it turns out! Check back tomorrow for a new series!


Pin It

Tuesday, November 15, 2011

Small Update: Greek Key

Who doesn't love a little Greek Key? When I was stranded at Wal-Mart I stumbled upon some Greek Key trim (who knew WM could be so stylish?!) and knew the perfect place for it!


I picked up this lamp at a thrift store a few months ago for $5 and the shade at target for $15. A little fabric glue and greek key trim later, we have this:


Subtle, but a little added sparkle!


Have you updated anything recently? Do tell!


Pin It

Wednesday, April 27, 2011

DIY overdyed rug

I normally try to post original content here, but this one is too good not to share. Kristen over at k.f.d. designs took an old $5 goodwill rug into something beautiful and current, which can be easily replicated! This is an especially good project because rugs are so expensive AND you can customize to whatever color your heart desires!

Before:


After:


Check out her post for the full instructions. If someone attempts this, please let me know! An old oriental rug is now on my list of things to look for!


Pin It

Thursday, February 24, 2011

Picasso Returns :)

After the painting I did in Monday's post, I was feeling pretty good about my art skills so I tried my hand at a couple of ink drawings this time, again from Anthro. I have been admiring them for a while and knew they would be perfect for my hallway!


{If you think you see me holding up a piece of cardboard to cover the light and reduce the glare in the reflection of the glass then you are right}


And for the inspiration images...


Who really has $1000 to spend on a couple of pieces of paper with some scribbles on them?


Pin It

Tuesday, February 22, 2011

DIY Monogrammed Pillow

I saw this tutorial over at k.f.d. designs and knew it would be perfect for the guest bedroom! Check out her post for the full tutorial and I will give my two cents here :)

I started by tracing my monogram straight from the computer screen onto paper.


Then used spray glue to attach the paper to the felt. {which really is genius by the way... this way you don't have to trace and leave marks, etc} Then just cut those babies out!


Annnd this is where my two cents comes in. Don't use too much spray glue or you will end up with this when the paper comes off... A little goes a long way here.


After round 2 we have this... much better!


Then a little hot glue and voila! A custom monogrammed pillow!


Did you see the new striped pillows, too? I ordered a couple from West Elm and love the way it looks! A nice way to add the pattern and color without buying the full sheet set. {I will just use white sheets}


And yes, I do still realize it is just a box spring on the bed. I promise we are taking care of this soon! Probably even tonight!!


Pin It

Wednesday, December 15, 2010

DIY Wreath

I made this yarn wreath from a tutorial I found here. It was so easy to make. All you need is a wreath form, yarn and felt! Now I just need to decide where to hang it...


Pin It

Monday, December 6, 2010

DIY Sunburst Mirror

Check out the sunburst mirror I made using the tutorial from Isabella and Max Rooms... it turned out wonderfully! It is hanging over the "buffet" in the dining room. I am currently looking for a campaign dresser to replace the table that is sitting there now. Still have a LONG way to go but wanted to share the mirror :)


The mirror is from BBB and the bamboo sticks are from Micheal's.

Excuse the bad lighting/picture. I never seem to be home when it is light outside...


Pin It

Monday, November 15, 2010

DIY: Striped Entry

I finally tackled painting the entry this weekend and decided to go with stripes. Here is the before:


I first painted the walls a creamy white. {Aren't my girls cute??}


Then, I taped using the delicate surface painter's tape {since I had just painted the walls 48 hours prior}.


After this, I just painted in the stripes with the same color that is in my living room, let dry for about 30 minutes and then peeled off the tape. I did not have ONE bleed through spot. I was so impressed with the tape! It came out perfect!


I am pretty obsessed and even the hubs approves! Now to get a new light, and entry table and accessories...


Pin It

Wednesday, June 16, 2010

DIY Silhouette Art

I have been wanting to make Adam and I's silhouettes for a long time but wasn't quite sure of the best way to do it. I have read a couple of tutorials and tweaked those to come up with my version.

1. Find a picture you want to make into a silhouette. I used a stock photo for mine {I know, I know. I liked it better!} and snapped a photo of Adam for his.


2. Trace the images onto contact paper with a sharpie. This is where you can make your nose smaller or your neck skinnier :)


3. Use an X-Acto knife to cut your image out making sure to have a continuous edge.


4. You will then stick the negative space to a piece of paper and paint in whatever color you choose. Be sure to paint from the outside in so you minimize the likelihood of the paint bleeding through. {use a heavier weight paper since you will be painting)


5. When the paint is almost dry, peel off the contact paper and you should have something that looks like this:


6. Cut out the image with the X-Acto knife or scissors.


7. Add fabric to your frame and tape or glue the silhouettes to it and you're done! {I used some burlap I had lying around and the IKEA RIBBA frame}


Pin It

Monday, June 7, 2010

Labor of Love

Remember this post where I talked about wanting to build the modern farmhouse table from Knock-Off Wood? Well... we did it! {finally}

It only took us about 3 hours to build the table {not counting finishing} and we spent about $60 on wood, $10 on stain and we had pretty much everything else we needed.


After 1 coat of stain:


After 3 more coats of stain:


The bamboo chairs are filling in until I find chairs. {Bamboo chairs are going in the breakfast nook}


We used black screws and are leaving them exposed right now for a more rustic look, but I am still trying to decide if I like it.


It is a pretty big step to have a table in our dining room. It has been empty for so long!


Pin It